Kefir is a fermented, creamy milk drink that originated in the Caucasus Mountains. Kefir is made by using kefir “grains”-not to be confused with real grains-like wheat or rice. Kefir grains are a symbiotic cluster of lactic acid bacteria and yeast that looks like a small piece of cauliflower floret, but soft and pliable. The microorganisms are held together in a carbohydrate, protein and lipid matrix. Numerous scientific studies undeniably identify kefir as a food that supports health and wellness. Usually kefir “grains” are passed on by friends and neighbors, because the more kefir you make, the more grains you will have. Eventually, you will need to give them away or think of something else to do with them. If you don’t know of a friend that makes kefir, then you can find them online. Kefir is one of the easiest ferments to make. As with any anaerobic ferment, I like to use a Pickl-It to make mine. You can purchase these jars at this website: Pickl-It
You will need:
- 1 Tablespoon of kefir “grains”
- Approximately 2 cups of milk
- The higher your milk to kefir ratio, the longer it will take to ferment. You want it to take about 24 hours. You can increase your volume of milk by 10% after each ferment. Your kefir grains will grow as well.
Directions:
Add the kefir grains and milk to your Pickl-it jar. Stir with a stainless steel or plastic spoon. Lock the Pickl-It. Add water into the airlock to the designated line. Cover the vessel (not the fermentation lock) with a tea towel and let ferment for approximately 24 hours at 65º – 82ºF. You will know that the kefir is done when you see a slight separation in the milk at the bottom of your Pickl-it. You should barely be able to see the separation.
If you leave the grains in too long, there will be a distinct separation-a layer of watery fluid at the bottom of jar (whey) and the kefir (curds) at the top. In this case, the curds will be grainy and when you mix the curds and whey together, the resulting kefir will be thin and sour. Keep an eye on it!
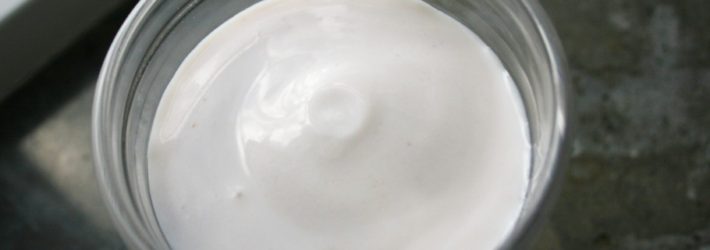
A word about the Picklit jar. Some people make kefir in screw top jars and it turns out fine; however, the research that I have done on this subject indicates that you get different bacteria when using a screw top jar vs the Picklit. The reason why is almost all ferments (except for kombucha) should be made in an anaerobic environment, meaning, they should not have access to oxygen. With a screw top jar, oxygen can get in through the threads of the jar. You can purchase a spring lock jar at Walmart; however, it does not come with the airlock-which is the funny, convoluted, plastic piece that fits into the rubber grommet on top of the Picklit. The airlock allows carbon dioxide to escape and keeps oxygen out. Without the airlock, you have to remember to burp the jar once or twice a day. Here is what the finished kefir should look like. The buttery layer on top is, well, butter-almost. I use raw milk that I get from a friend who has Jersey cows. The cows produce really rich milk with plenty of heavy cream.

Now you might be asking yourself “people have been fermenting for hundreds of years and they didn’t have special jars.” This is true, but they did go to great lengths to keep their ferments free from oxygen. For kefir, they stored the milk in animal stomachs and wrapped them tightly and stored them upside down. For kimchi, a popular Asian cabbage ferment, they put it in clay pots and actually buried them underground. I know this because I saw it once on the travel channel.
If you are unable to tolerate any level of lactose, remove the grains once you see the separation at the bottom of the Pickl-it, mix the kefir well and leave the kefir out for a little while longer. This is called a second ferment. Again, don’t let it go too long or it will be unpalatable-so watch it closely. Or, you can add liquid lactase enzyme drops to the kefir to remove any remaining lactose (my preferred method because the longer you leave it to ferment, the more sour it will taste). You can find these drops on Amazon.com
The milk should be thick, but not as thick as yogurt. At this point, you can use a clean hand and retrieve the kefir-if it remains in a large clump, or use a stainless steel or plastic strainer to strain out the kefir. Your strainer mesh will need to be wide enough apart to allow the thickened milk to flow through. I prefer using my hand and feeling around in the milk for the grains. Once you pick out or strain the kefir grains, store them in a jar with fresh milk until you use them again. They will typically keep in the refrigerator for up to 1 month without being used.
For the prepared kefir, you can use an immersion blender to get a smooth consistency. I like to add cinnamon, vanilla and a little stevia to mine, but it is also great in smoothies!